Ad Blocker Detected
Our website is made possible by displaying online advertisements to our visitors. Please consider supporting us by disabling your ad blocker.
Have you been shopping for a compact, reliable wire feeder that can handle gasless MIG work and fit into your 3-in-1 welding setup?
Quick verdict
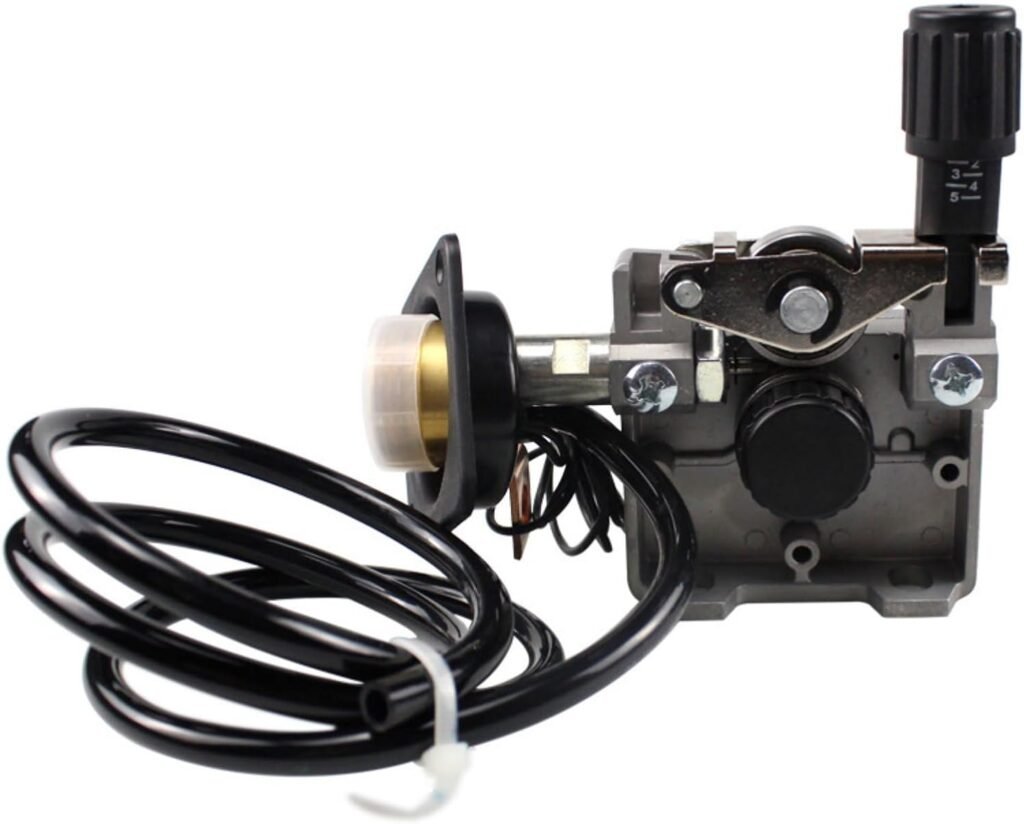
You get a compact, purpose-built wire feeder with the DC 24V 40W Mig Welder Feeder, Welder Roll Wire Feed Motor with copper Interface Assembly Support 0.6-1.0mm wire up to 5kg welding wire, for Flux Core MIG Welder/Lift TIG/Stick 3 in 1 Welding Machine that is focused on straightforward, gasless MIG applications. It’s built to be simple to install and operate, and it’s especially useful if you need a replacement or upgrade for a small MIG setup.
What this product is
This wire feeder is a DC 24V, 40W single-drive motor unit designed for gasless MIG welding with flux core wire and for use in multi-process 3-in-1 machines. You can fit up to 5 kg of welding wire and use wire diameters from 0.6 mm to 1.0 mm, which covers the most common flux core wire sizes for light to medium welding tasks.
Who it’s for
If you’re running a small workshop, doing mobile repairs, or working with a 3-in-1 welder that uses a separate wire feed unit, this model will fit into your workflow. You’ll appreciate it if you want an affordable, rugged feeder that keeps things simple and minimizes downtime.
What it isn’t
This isn’t a multi-roll, professional industrial feed system for heavy production welders or specialized robotic setups. If you need ultra-high throughput, advanced digital controls, or multi-roll pinch feeding for exotic wire, you’ll want to look at heavier-duty commercial feeders.
Design and build quality
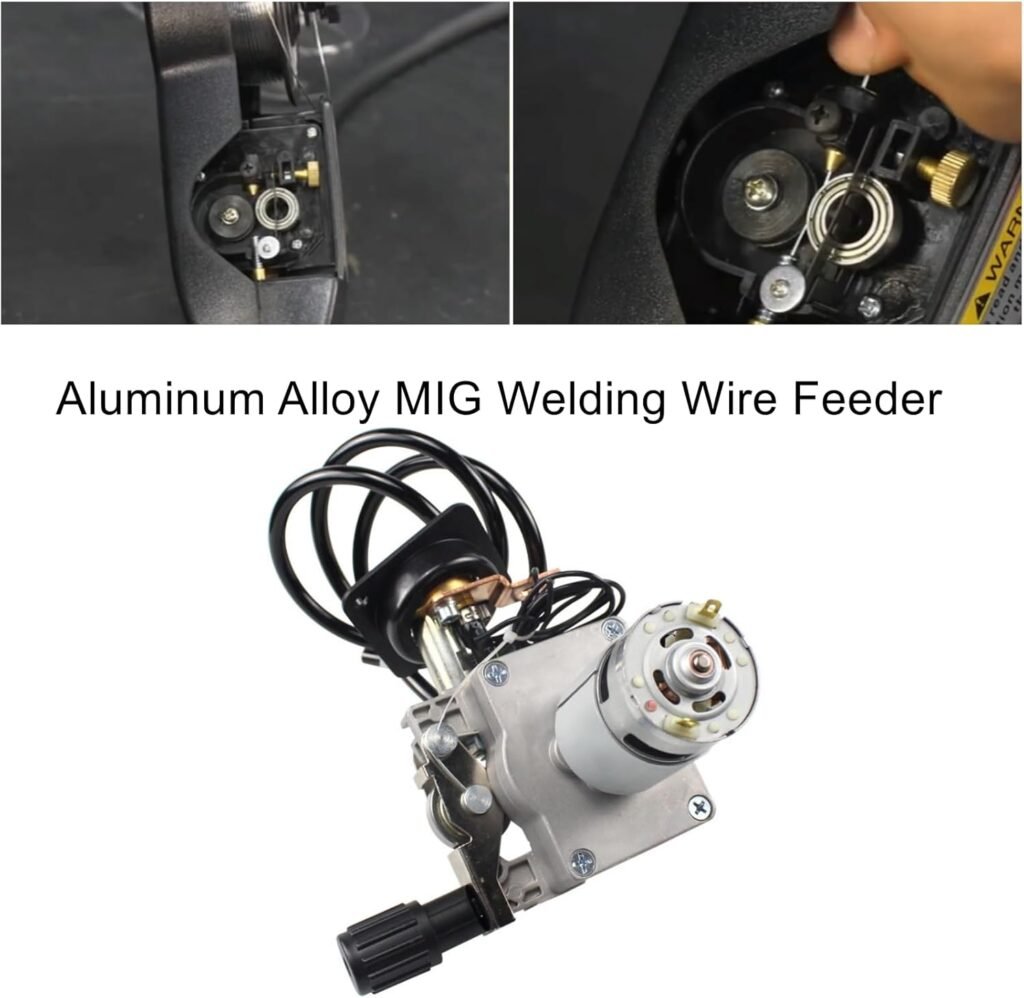
The DC 24V 40W Mig Welder Feeder is built with a single-drive motor and a copper interface assembly for the installation interface, prioritizing reliability in a compact footprint. You’ll notice the straightforward mechanical design, which makes maintenance and part replacement easier when you’re working in the field.
Materials and construction
The key parts include a sturdy motor housing, a handle that locks for transport convenience, and compatible V-groove and K-groove feed wheels. You’ll find the copper interface assembly helps with solid electrical and mechanical connection, and the overall build supports repeated loading of 5 kg spools without excessive flex.
Ergonomics and form factor
With a width of 140 mm and a height of 150 mm when the handle is locked, this feeder is compact and easy to position on many workshop tables or integrated into portable setups. You’ll like the manageable size if you have limited bench space or need to mount the feeder on small cabinets or frames.
Compatibility and use cases
You can use this feeder with Flux Core MIG Welder, Lift TIG, and Stick 3-in-1 welding machines that accept external wire feed units. It supports wires 0.6–1.0 mm in diameter and works well for spot welding and continuous MIG/MAG operations in light fabrication, automotive repair, and hobby metalwork.
Matching with welding machines
Before you buy, confirm your welder accepts a DC 24V external feeder and has the required interface for the copper assembly. If your machine supports an external feed motor and matches the electrical/connector specifications, you should be able to integrate this feeder without major modification.
Ideal projects
You’ll get the most value from this feeder on tasks like sheet metal repair, small structural tack welds, fence and gate fabrication, farm equipment repair, and general-purpose flux core welding where portability and ease of setup matter.
Performance and torque
Performance is solid for the target use. The feeder delivers a wire feeding speed of 2–18 m/min and offers a significant maximum operating torque of 15 kg·cm and an instantaneous peak of 36 kg·cm. That torque range means the unit can handle typical flux core wires cleanly and maintain steady feed under common welding resistances.
Feeding speed and control
You’ll be able to adjust feed speed between 2 and 18 meters per minute, which covers delicate tack welding up to continuous runs for mid-thickness joints. The speed range gives you enough control to dial in the correct deposition rate for commonly used wire diameters.
Handling resistance and stiction
Thanks to a relatively high instantaneous torque, the motor can overcome short-term stalls or drag caused by wire spools, routing bends, or slightly sticky wires. That helps reduce the chances of bird-nesting at the drive roll and keeps weld continuity more reliable during spot welds and starts.
Wire feed and wheel compatibility
The feeder supports both V-groove and K-groove feed wheels, and it can handle 0.6–1.0 mm diameter wires. You’ll appreciate the flexibility to change wheels for different wire formats and the ability to use either flux core or potentially gas-shielded wires if your machine and torch setup allow it.
Replacing feed wheels
Swapping between V-groove and K-groove wheels is a simple mechanical task; you’ll change wheels to match the wire diameter and type for optimal bite and minimal deformation. Keep wheels clean and free of slag or wire brush debris to maintain consistent feeding.
Working with different wires
If you use 0.6 mm wire for thinner metals and 1.0 mm for heavier gauge work, the feeder gives you the coverage you need. Just make sure the feed pressure is balanced so you don’t crush thin wire or let heavier wire slip.
Installation and interface assembly
The product includes a copper installation interface assembly that simplifies connecting the feeder to compatible welding machines. You’ll want to pay attention to alignment, secure mechanical mounting, and correct electrical hookups to prevent feed or power issues.
Mounting considerations
You’ll find the unit fits most compact feeders’ mounting points; measure your mounting plate and ensure you can secure the feeder firmly so the drive interface aligns with the wire conduit and torch. A loose mount can cause misfeeds or excessive wear on the drive wheel.
Electrical hookups
The feeder is designed for DC 24V input at 2.5A and 40W power, so confirm your machine’s feed motor output or use a compatible external supply. If your welder provides the correct feed output, plug the copper interface in per your machine’s manual and test feeding without arc first to confirm rotation and speed control.
Noise, stability, and reliability
Noise is relatively low for a feeder of this size, and you’ll appreciate steady performance across long runs. The motor is engineered to run quietly under typical loads while maintaining torque for continuous feeding.
Operational noise
You’ll notice reduced vibration and lower noise compared with older, less refined feeders, making the feeder more pleasant to use in small shops or mobile environments. Quiet operation also helps you focus on weld quality and hearing other workshop signals.
Reliability under load
This feeder’s long service life is supported by solid mechanical parts and a motor that’s rated for repeated starts and stops. If you maintain it—keep the gears and drive components clean and lubricated—you’ll avoid premature failure and keep the feeding consistent.
Maintenance and service life
Routine maintenance is straightforward: keep drive wheels free of debris, check tension and alignment, and occasionally inspect the copper interface and motor brushes (if brush access is provided). You’ll find that modest upkeep extends the service life considerably.
Routine checks
Inspect the feed wheel surface, pressure roll, and wire guide for wear every few months if you weld frequently. Replace wheels and guide tubes when they show grooves or deformation to prevent feeding problems.
Long-term durability
The feeder’s mechanical simplicity and emphasis on torque and low noise contribute to overall durability. If you use it for routine light-to-medium welding and avoid overdriving it beyond recommended speeds or wire sizes, the unit should remain functional for years.
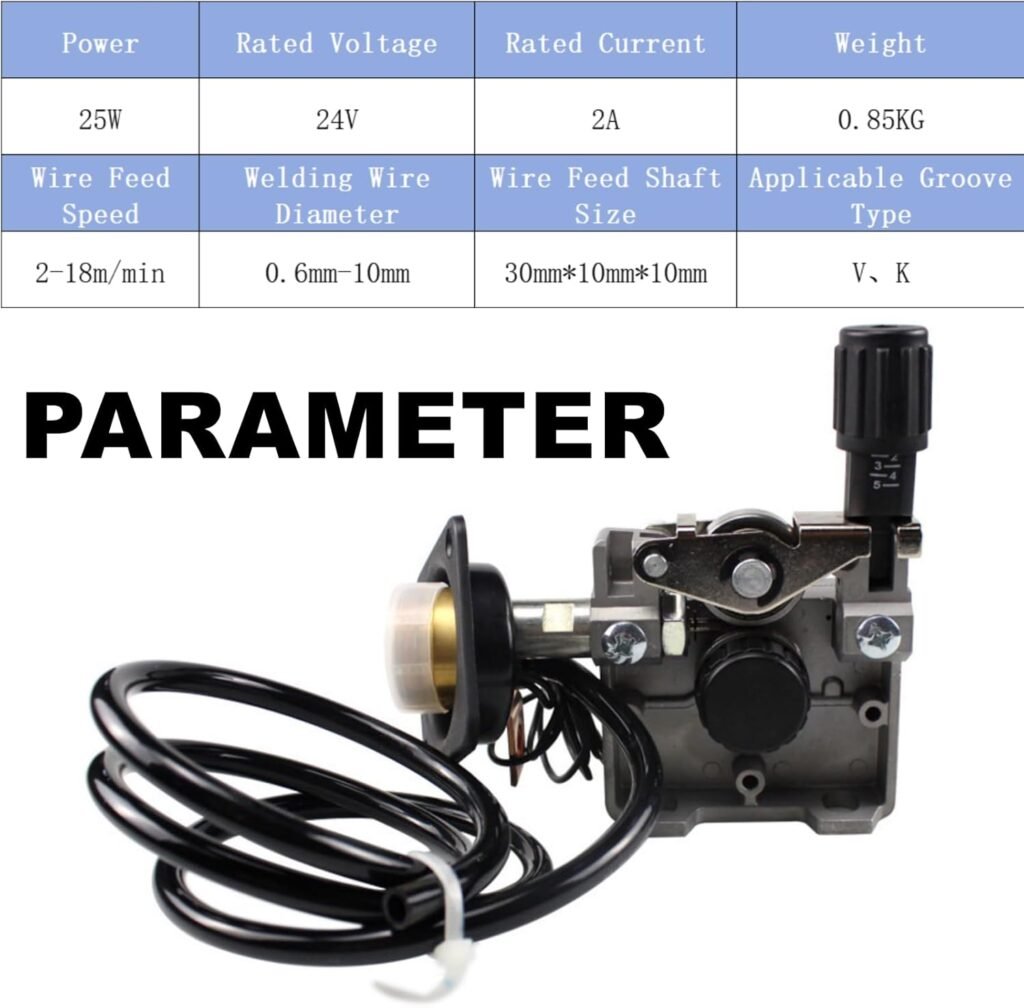
Table: Quick specification breakdown
| Feature | Specification |
|---|---|
| Product name | DC 24V 40W Mig Welder Feeder, Welder Roll Wire Feed Motor with copper Interface Assembly Support 0.6-1.0mm wire up to 5kg welding wire, for Flux Core MIG Welder/Lift TIG/Stick 3 in 1 Welding Machine |
| Voltage | DC 24V |
| Current | 2.5 A |
| Power | 40 W |
| Wire diameter supported | 0.6 mm – 1.0 mm |
| Max spool weight supported | Up to 5 kg |
| Wire feed speed | 2 – 18 m/min |
| Motor torque (operating) | 15 kg·cm |
| Motor torque (instantaneous peak) | 36 kg·cm |
| Feed wheel types | V-groove and K-groove |
| Feed tube compatibility | 3 m – 10 m |
| Dimensions (width) | 140 mm |
| Dimensions (height with handle locked) | 150 mm |
| Noise | Low |
| Typical applications | Flux core MIG, spot welding, continuous MIG/MAG welding |
| Compatibility | For 3-in-1 Gasless MIG/Welders with appropriate interface |
What’s in the box
You’ll typically receive the feeder motor assembly, a copper installation interface assembly, a set of interchangeable feed wheels (V and K grooves as applicable), and mounting/installation hardware. The package usually includes basic documentation or a quick-start guide to get you connected.
Additional items you might need
You should have a compatible drive tube or liner, a wire spool holder or bracket sized to 5 kg spools, and any necessary brackets or adapters for your specific welding machine. If your machine doesn’t provide a matching connector, you may need to adapt wiring or purchase an adapter.
Checking the contents
When you unbox the unit, confirm the feed wheels and hardware are present and that there’s no shipping damage to the drive motor or copper interface assembly. Missing parts or damage can be handled through the vendor’s support or return policies, so inspect early.
How to install the feeder
Installing is fairly straightforward if you follow your welder’s manual for external feeders and use the included copper interface assembly. You’ll attach the feeder mechanically, connect its power and control wiring, route the liner and torch through the guide, and run a test feed before striking an arc.
Step-by-step installation (high level)
- Securely mount the feeder to your mounting plate or bracket.
- Connect the copper interface to the matching plug on your welding machine.
- Load the wire spool (up to 5 kg) and fit the appropriate feed wheel for your wire diameter.
- Install the liner and route the wire to the torch or contact tip.
- Set the feed tension and initial feed speed, and run the feeder without an arc to confirm proper rotation and feeding.
- Adjust parameters as needed before welding.
Tips for a clean install
Keep all wire path components aligned to minimize bends, which increases feeding friction and wear. Use the correct diameter liner for your wire size and make sure the pressure from the pressure roll is enough to grip the wire without flattening it.
Tools you’ll need
You’ll want basic hand tools: a set of wrenches or sockets for mounting hardware, pliers for handling wires, a wire cutters and wire brush for cleaning contact tips, and possibly a small screwdriver for adjusting pressure and securing connectors. A multimeter can help verify electrical connections.
Optional helpful tools
A spool holder or reel stand that reduces friction and allows the spool to rotate freely makes feeding smoother for longer runs. A small flashlight or inspection mirror helps when aligning small parts inside the feeder housing.
Common installation issues and fixes
If the feeder won’t feed, check wiring polarity and that the motor receives DC 24V. If you see bird-nesting at the feeder, reduce tension or inspect the liner and drive wheel for damage. If wire slips, swap to the correct groove feed wheel and adjust pressure.
Troubleshooting tips
- No feed: check power supply and connectors, confirm the motor runs without load.
- Wire slips: increase pressure gradually and confirm wheel profile matches the wire.
- Bird-nesting: reduce feed speed slightly and inspect liner and guide for obstructions.
- Inconsistent feed: clean feed wheel and pressure roll, and inspect for burrs or debris.
How to use: operating tips
You’ll get better results by matching wire size to feed wheel profile, keeping feed tensions moderate, and adjusting feed speed to the weld current and travel speed. Always do a short test weld and adjust feed rate and voltage for optimal bead appearance.
Adjusting feed speed
Start at a mid-range feed speed, then adjust up or down depending on metal thickness and welding current. Too fast can lead to burnback or spatter; too slow can cause poor fusion or uneven bead formation.
Changing wire sizes and feed wheels
When switching from 0.8 mm to 1.0 mm, switch to a K-groove or the proper groove that prevents slippage. When switching to thinner 0.6 mm wire, move to a V-groove and reduce pressure to avoid crushing.
Using longer liners (3m–10m)
Using longer wire feed tubes up to 10 m is supported, but expect slight increases in friction and potential delay in feed response. To help, use a smooth, high-quality liner and keep bends gentle; secure the spool so it feeds freely and avoid kinks.
Safety considerations
You should always follow basic welding safety: wear appropriate PPE (helmet, gloves, protective clothing), ensure proper grounding of your welding machine, and maintain ventilation when welding flux core wire due to fumes. Keep the feeder and wiring away from spatter and heat sources.
Electrical safety
Confirm your feeder and its connectors are rated for DC 24V and that wiring is secure and insulated. Disconnect power before servicing the feeder to avoid accidental starts or shocks.
Fire and fume safety
Flux core welding generates metal fumes and spatter; you should weld in well-ventilated areas or use local exhaust. Keep a fire extinguisher nearby and clear flammable materials from the work area.
Pros and cons
You’ll appreciate the simplicity and solid torque of this feeder, but you should also be aware of its limits for heavy industrial use.
Pros
- Compact and easy to mount in small shops.
- Supports common wire sizes (0.6–1.0 mm) and up to 5 kg spools.
- Good torque (15 kg·cm operating, 36 kg·cm peak) for overcoming short stalls.
- Low noise and steady operation for longer runs.
- Interchangeable V and K groove feed wheels for flexibility.
Cons
- Not aimed at high-volume industrial environments with multi-roll systems.
- Limited to 24V DC input—won’t work without a compatible welder or adapter.
- Basic controls; you’ll need your welder or external controller for advanced settings.
- If your use is heavily continuous at the limits of size/speed, occasional maintenance is required.
Frequently asked questions (FAQ)
Q: Can I use this feeder for gas-shielded MIG too?
A: This feeder is designed primarily for flux core (gasless) use but can work with gas-shielded wire if your torch and machine support it and you use a suitable liner and feed wheel.
Q: Will it accept my existing spool holder and mounting plate?
A: It supports common mounting arrangements, but you should measure and compare mounting hole positions to ensure compatibility or prepare simple adapters.
Q: How long are the feed tubes supported?
A: The feeder supports wire feed tubes ranging from 3 m to 10 m, but longer runs may increase friction and require a smooth liner and gentle routing.
Q: What maintenance is required?
A: Periodic cleaning of feed wheels and liners, checking pressure tension, and inspecting electrical connectors will keep the feeder performing well.
Q: Is it noisy?
A: It’s relatively low-noise for its class, designed to run quietly in small workshops.
Final thoughts and recommendation
If you need an affordable, compact, and reliable wire feeder for gasless MIG work or to pair with a 3-in-1 machine, the DC 24V 40W Mig Welder Feeder, Welder Roll Wire Feed Motor with copper Interface Assembly Support 0.6-1.0mm wire up to 5kg welding wire, for Flux Core MIG Welder/Lift TIG/Stick 3 in 1 Welding Machine is a practical pick. You’ll benefit from its torque, low noise, and support for common wire sizes and spool capacities.
If you plan to use it for light to medium tasks, spend time on correct installation, choose the right feed wheel and liner, and perform periodic maintenance. With those steps, you’ll find it a dependable addition to your welding setup that keeps your projects moving smoothly.
Disclosure: As an Amazon Associate, I earn from qualifying purchases.


